The No-Sew Watch Update
2018 is the year I'm bringing back the watch - as not just a practical, but stylish accessory. If like me you’ve banished a watch you love to the back of your drawer because of a broken strap, promising one day (read: never) to get it fixed, then this is the DIY for you. Luckily, giving your watch a makeover is so inexpensive but effective, this DIY cost less than £5. Perfect for the middle of January! This is a no-sew project, but if you wanted to make it even easier you could use a silk handkerchief or thin silk scarf as a strap, instead of fabric. You could even use a simple velvet or satin ribbon tied chic-ly into a bow. There are so many variations on this, you could have one for each day of the week.

I bought this fabric at a local shop, which meant I could buy the exact amount I needed (costing a mere £1.50). If you don’t have a fabric shop near you, eBay is the place to buy cotton fabric, at only £3-4 per metre. Type ‘print cotton fabric’ into eBay and be amazed at the thousands of pretty printed options available. I love this geometric print, these ditsy florals, and this striped fabric, to name but a few.
You’ll need
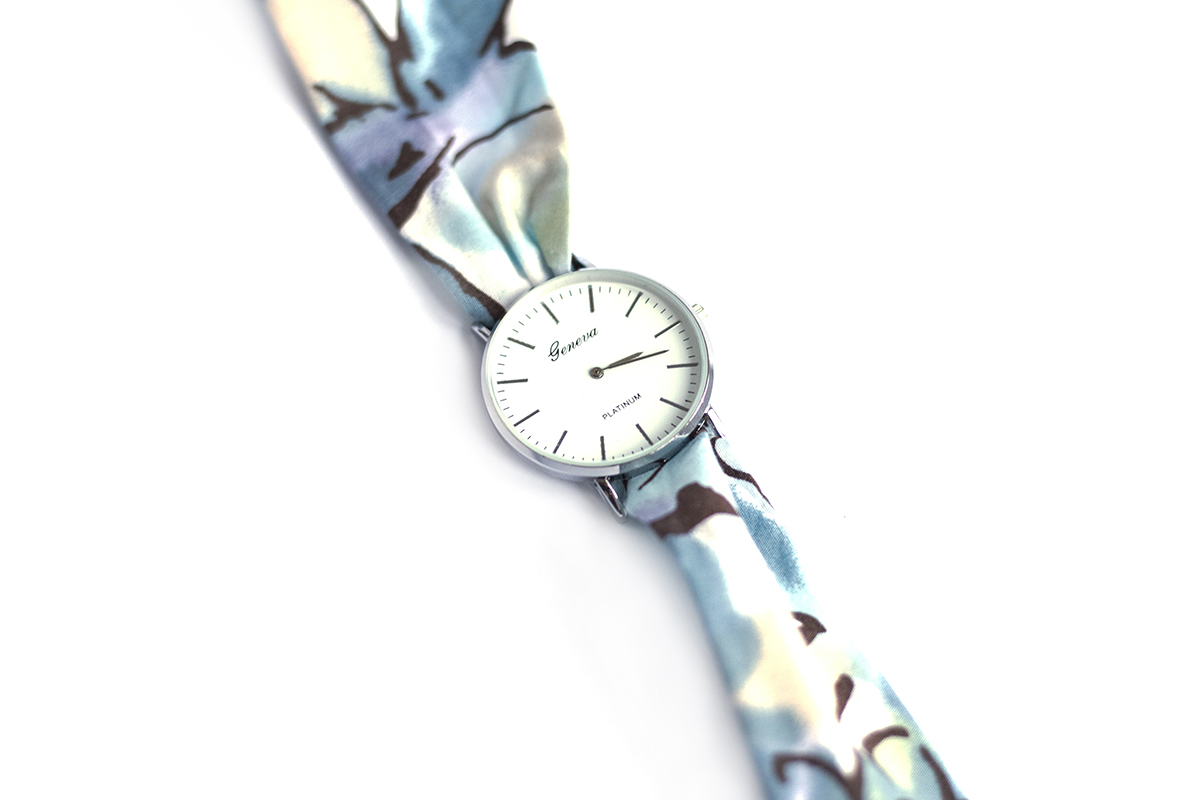
- A strip of 14cm x 45cm fabric. (cotton is the easiest to work with for this project, you can find a similar here. 45cm length means you can wrap the fabric around your wrist twice, to show off the pattern. But you can always make yours shorter – the perks of customisation!)
- Fabric Glue (this one is ideal as it’s strong and great for fabric)
- Biro Pen
- Ruler
- Fabric Scissors
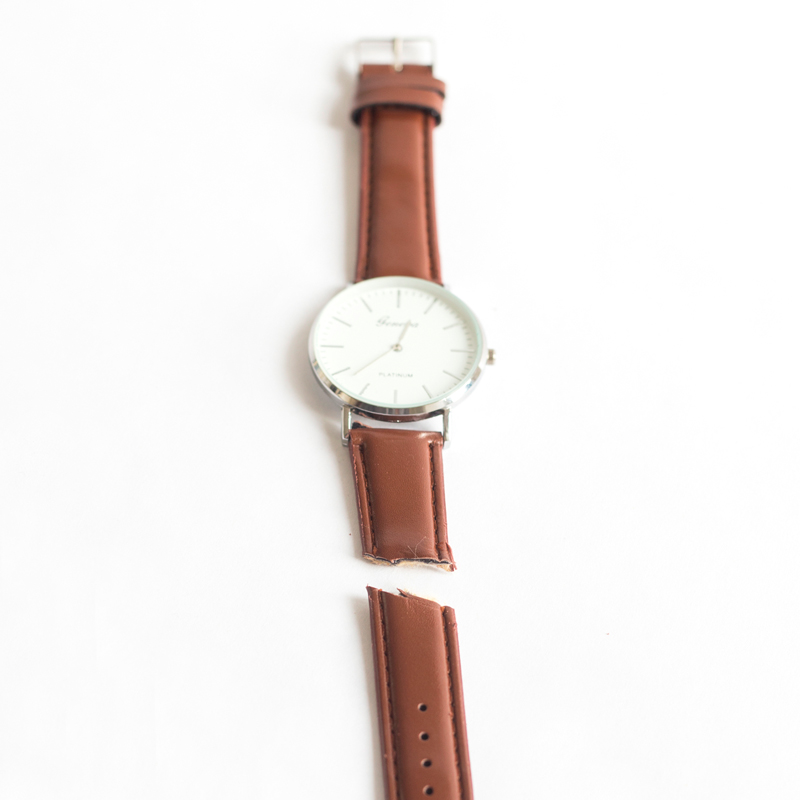
- Strapless Watch Face (make sure the watch has an approximate 4cm gap to thread a fabric strap through, search ASOS for some gems)


How To
- If your watch strap is broken, remove it by making a cut at fastening, near the watch face. Be careful not to interfere with the pin that holds the face in place, this is where you’ll thread your fabric through.
- Firstly, if needed iron your fabric so it’s straight and crease free.Next, measure and cut out two strips of 45cm x 7cm fabric with your fabric scissors.
- Take your first strip of fabric and measure 1.5cm inwards all along the strip. Measure and make a faint line mark with your pen.
- Join the line faintly, using a ruler and your pen.Fold in the seam, up to your 1.5cm line. Repeat this on each side, on both strips of fabric.
- To create a point at the end of each strip, fold in each side until it makes a point. Glue this down with your fabric glue, repeat at each end of both strips of fabric.
- Glue a line sparingly along the seam edge of each side of fabric, and glue together with the other strip. This will neaten the strip and make sure both sides show the front of the fabric.
- Leave to dry under a book or heavy, flat object for 20 minutes. If desired, you could always go round the edges with a needle and thread at the end.
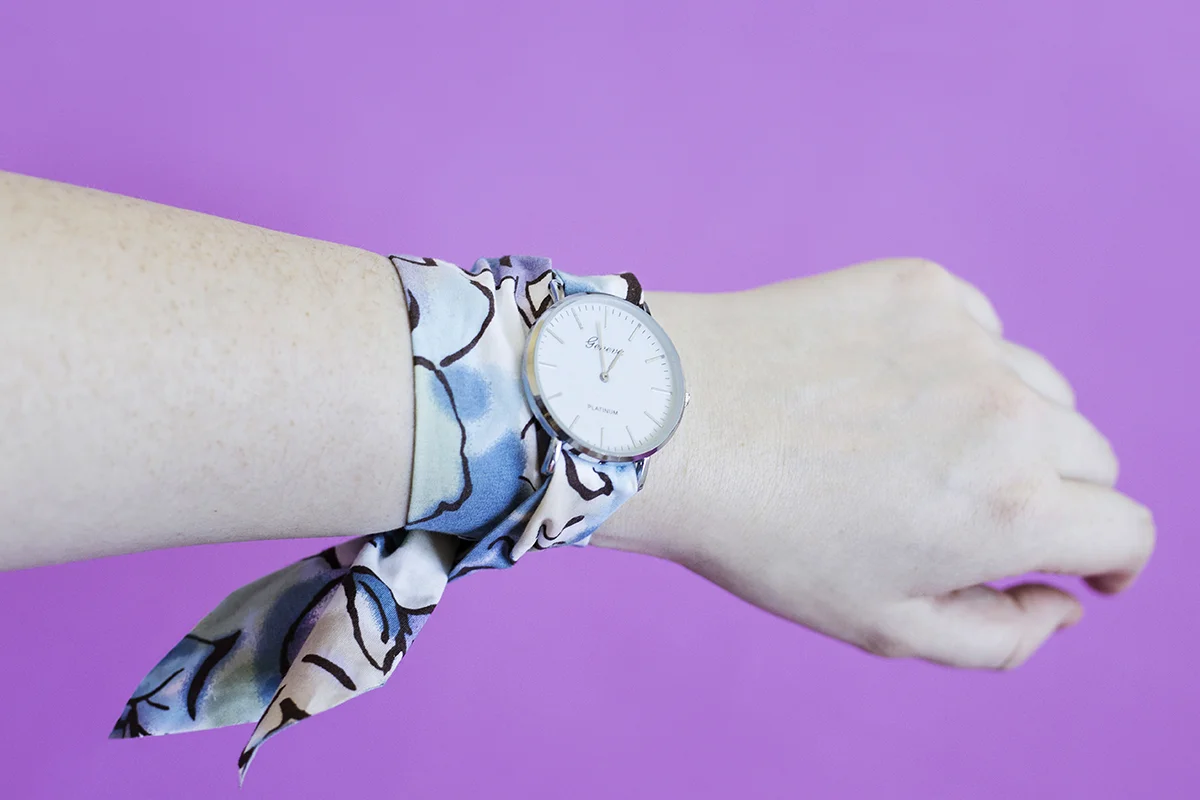
- To wear, thread the fabric through the back of the watch ‘handles’ We pulled one side of the strap ¾ of the way through, instead of making it even. Making the strap longer on one side means you can loop it around your wrist. Once you have the length right, you could always add a dot of fabric glue to the back of the watch face, to keep it in place.
Tie in a bow and you’re good to go!