Ad: A DIY Fireplace in a Rented Home with B&Q
This post is in paid partnership with B&Q.
For the final post in my B&Q Renters series I thought I’d tackle something I have always lusted after when renting, - a feature fireplace. When we moved into this house it was the first place we had lived with an actual fireplace, but it’s always been hidden with June’s toys in front of it as the fire on its own wasn’t the best looking. Last winter I had the idea to add a mantelpiece and tiles, but it wasn’t until B&Q got in touch after the summer that I remembered all about my DIY dreams last winter. I love changing my rented space, with the permission of my landlord. My surroundings can really influence my mood, so updating a rented property is something I’ve always done in one of my many many moves over the years.

The fireplace was a bit tricky, as of course I want to make it completely removable once we decide to leave here with as little work as possible. Sometimes I have these ideas and actually don’t know if they'll work in reality. For this project, I did enlist my dad, to run my idea past and to make sure it would work structurally. We did take the skirting boards off, which we'll replace when we leave. Asides from this it’s attached with a few screws which we will polly filler up and paint over.

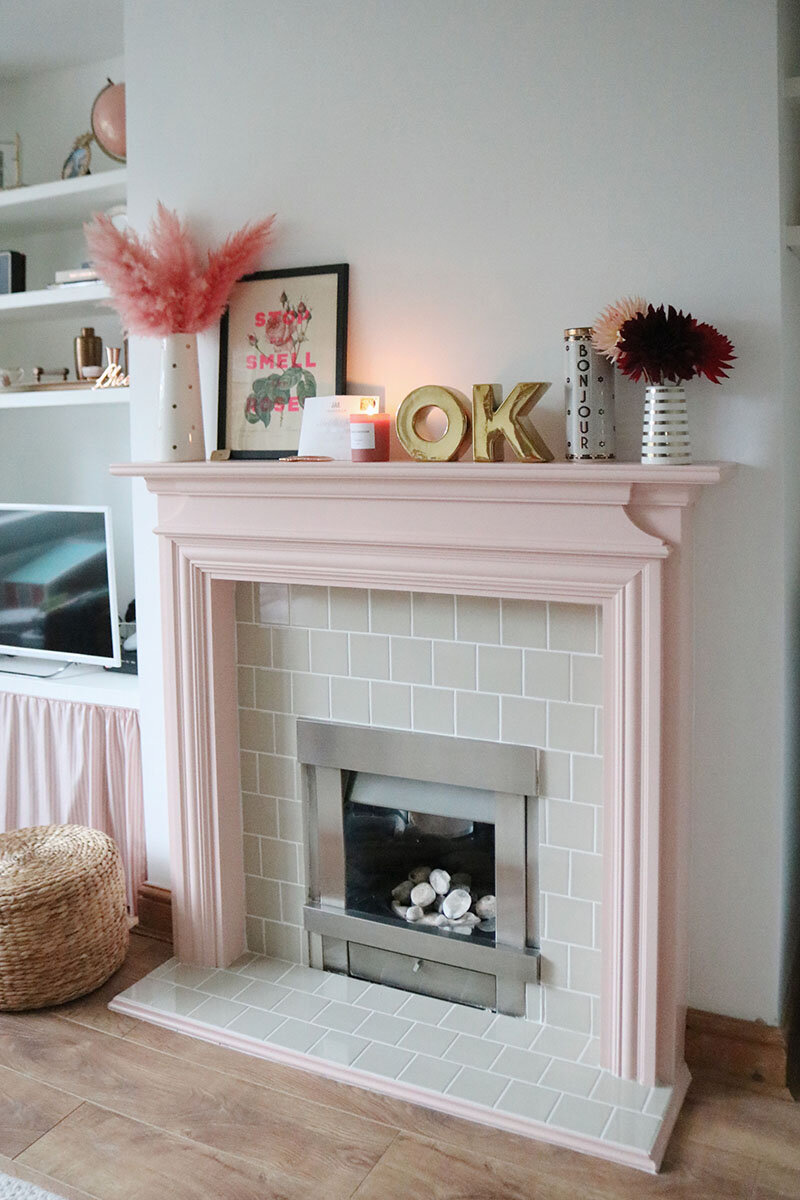
I am over the moon with the results and think it really ties our living room together. June’s toys are still there, but we’ve condensed them into the cupboard and baskets next to one of the chairs (which you can’t see as soon as you walk in, but trust me the toddler chaos is there). Can’t wait to be curled up on the sofa, over the winter, with lots of candles burning and the fire switched on, it’s made my rental dreams come true.


You will need:
Utopia Barley Gloss Tiles 100mm x 100mm
PVA / Wood Glue
Bucket
Pink Camisole Valspar Satin Paint
Architrave
No More Nails
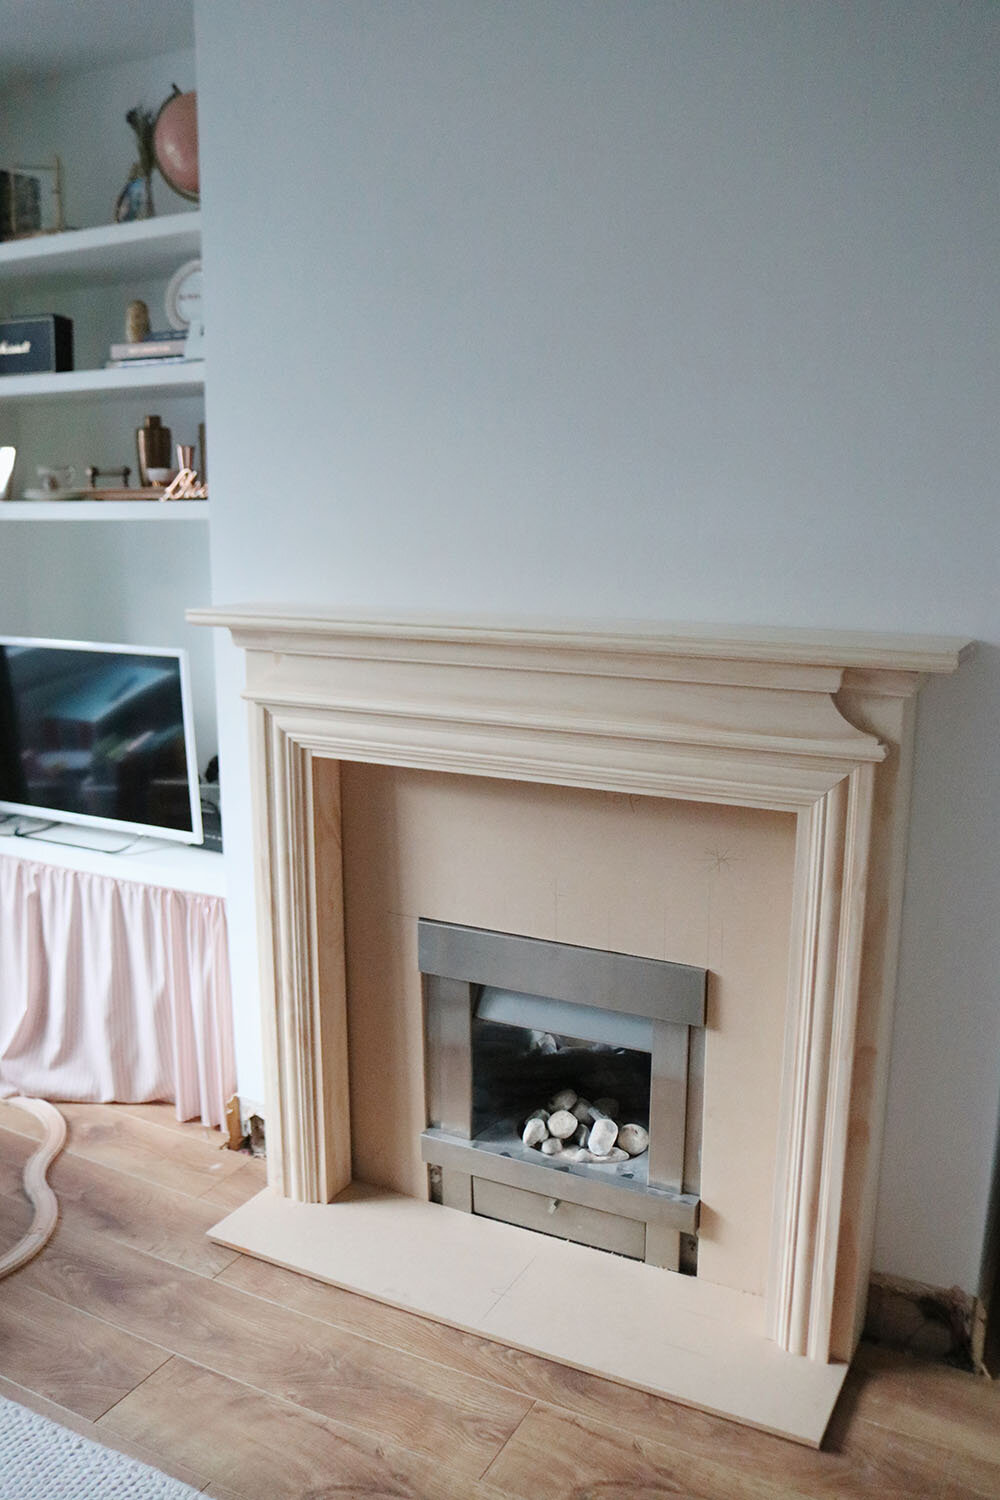

The MDF sheet needs to be cut slightly smaller than the dimensions of the fire place, which can always be found on the B&Q website. Also, to find out how many tiles you will need, they have a handy tile calculator online too. We had a few left over, but it's better to have too many than too little.
Before we set to work, we set up the fireplace and sheets of MDF to check we'd cut it correctly, and also to draw the inside of the fireplace on the MDF board as a helpful template. Once this had been done, we needed to lay out the tiles on the MDF to decide how we wanted them laid out. Once we were happy it was time to get it going properly. Tiling in general is a bit of a messy job, so ensure you wear old clothes and protect your work space if working inside.

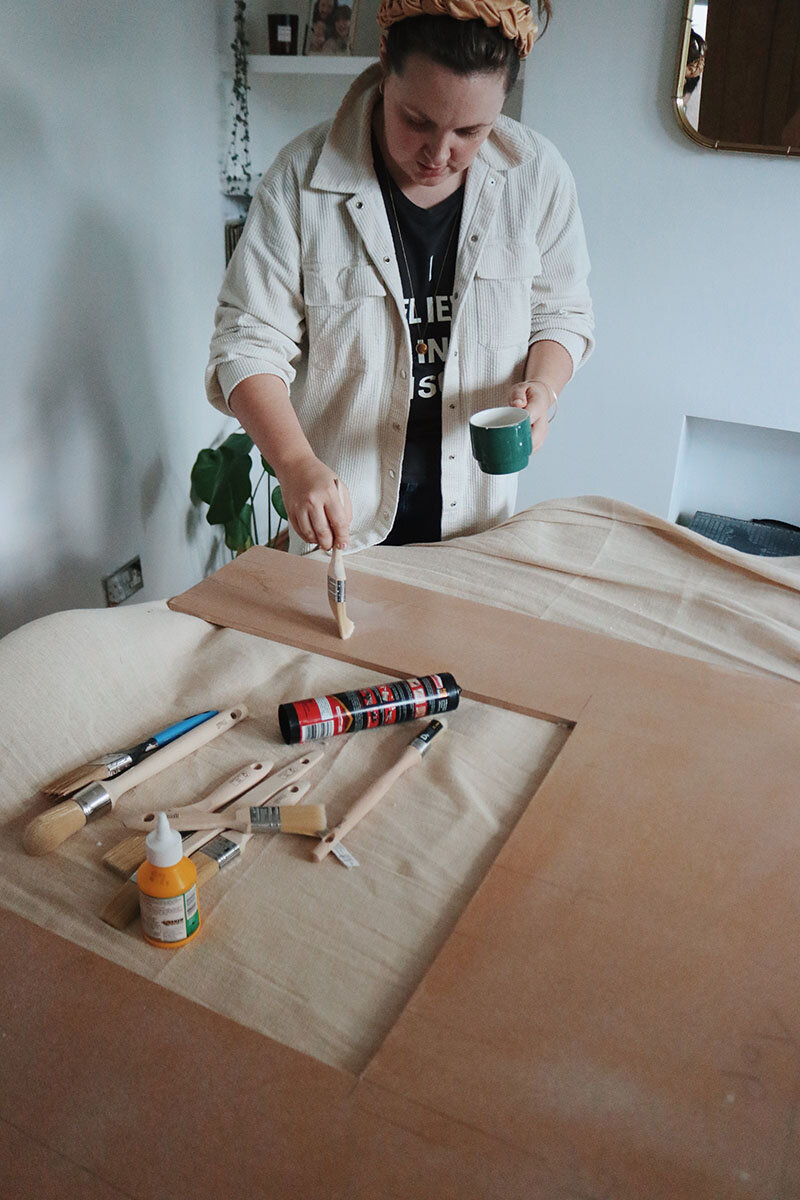
Firstly, we painted the wood with wood glue/water mix before we spread on the tile adhesive to ensure it would stick. We used powered tile adhesive, as it contracts and expands with heats, however it is a little trickier to work with if you’re not an experienced tiler (which surprise surprise, I am not!).
We mixed the tile adhesive as per the packet instructions. For this we needed a bucket and off cut of wood to use as a mixing stick.
We spread the tile adhesive onto the MDF with the notched trowel, and then started to add tiles with spacers in between. Don’t spread more adhesive than you will need in 30 minutes, as it does dry quite quickly. In hindsight we thought, we might have tiled it with the MDF sheets in place around the fire, but you live and learn and this way worked just as well.


To cut the tiles to the width you need, use the tile cutter - it is quite an intimidating machine, so if you felt you wanted something a bit more on a beginner level a manual tile cutter would work just as well.
We laid the tiles on the adhesive, using the spacers to ensure a streamlined gap between each one. We also kept a sponge and bucket of water handy to wipe the tiles extremely gently, to ensure no adhesive dried on the front of the tiles. We didn't tile right to the edge of the MDF, just overlapping our pencil lines, from earlier. Once we were done, we left it to dry overnight just in case.


The next day was the grouting part, again another messy job! So many times during this home improvement project I thought I had bitten off more than I could chew, but kept on going. Tiling was just a messy job!
I applied the grout using a grout spreader and really worked it into the gaps between the tiles. When I had filled in every space, after I finished I used a damp sponge to wipe off the excess grout before it dried. When you do this, if any comes away, just fill it back in again quickly. Once the grout dried, it left a film all over the tiles and we started to polish this off with a cloth, again a messy job but it didn't take too long to start looking good!


Whilst all the tile part was drying the fireplace needed putting together. It arrived in three parts, but didn't take a lot of assembling. We just needed a drill for this part. The assembled fireplace only took two coats of paint, one we applied whilst it wasn’t attached to the wall, and the second one was best left until everything else was in place and the tiles had been grouted etc.
With the two MDF sheets, tiled and grouted, it was time to attach them to the fireplace. This was done with 'No More Nails' and as many screws as we felt we needed. The whole thing was attached to the wall with the fireplace fixings.


To finish it off, we ran wooden architrave around the bottom tiles which sit on the floor, which last minute was painted pink to tie it all together.
Bring on those frosty winter nights! Do you have a fire in your home? Let me know your thoughts in the comments!
