Painting Laminate Wardrobes with B&Q
This post is in paid partnership with B&Q.
In the first post for my B&Q Renter series, I decided to finally get myself a proper wardrobe. I can’t actually remember the last time I had wardrobes. As I rent, I’ve always been drawn to places that have no built in storage whatsoever, which isn’t very helpful once you’ve moved in, it’s why I’ve always had all my clothes hanging on a rail next to the bed for so many years. This house was classified as unfurnished and, as a renter it can feel quite daunting to actually make these changes.
However, when we moved in the wardrobes were left in our bedroom, at first I was thinking it was going to be a pain to get rid of them, but as we had nowhere to hang our clothes both Jack and I filled them up. After a few months, I realised how much I actually loved having wardrobes instead of a rail, clothes weren’t getting dusty and I could hide the clutter behind closed doors if anyone came to visit (mind you, who is looking in your bedroom when they come to stay?!).
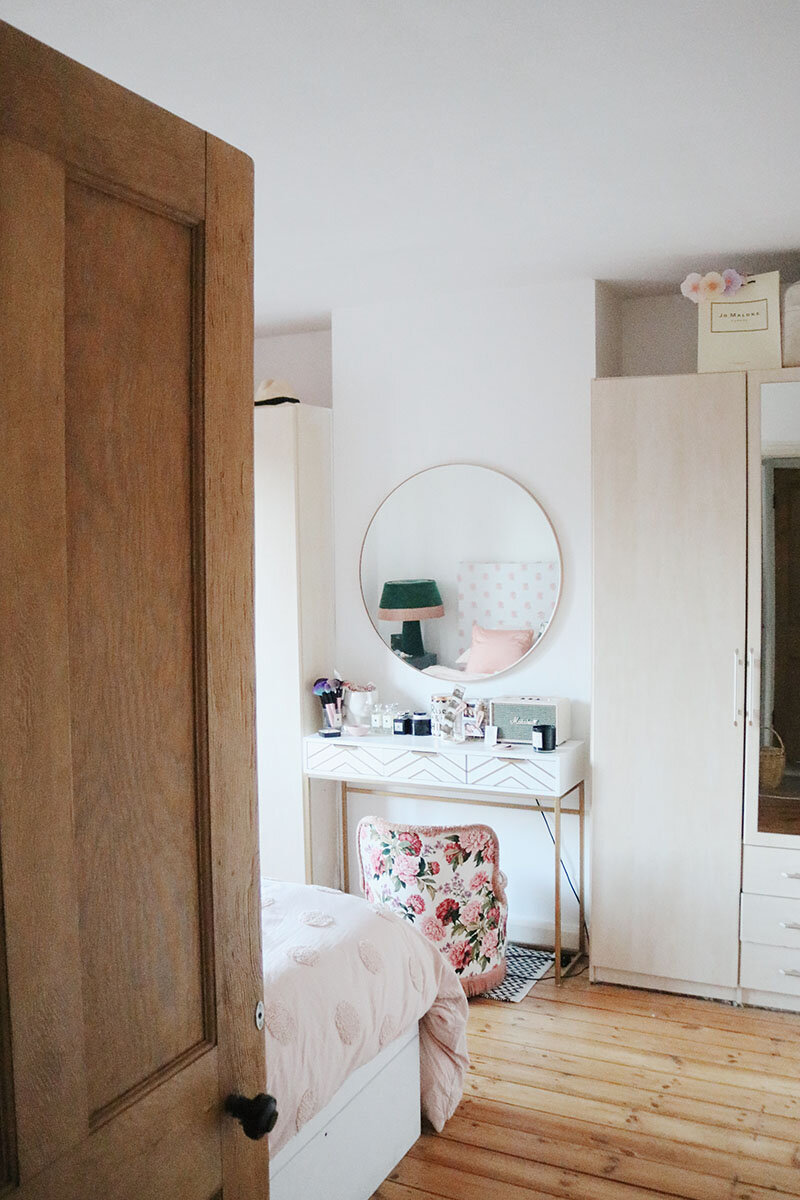


Whilst I loved the functionality of the wardrobes, I didn’t love the design, so I asked my landlord if I could paint them and she said yes! We are really lucky with our landlord, and that was one of the reasons we live where we live as we knew we would be allowed to put our own stamp on it, I know not everyone is in the same position.
You Will Need:
Polyfiller
Spatula
My top tip to anyone embarking on decorating is that preparation is key. To avoid turning my house upside down completely once we’d taken the doors off the wardrobe frame, we decided to leave the clothes hung up and tape tarpaulin sheets around the clothes to avoid them getting paint on them.
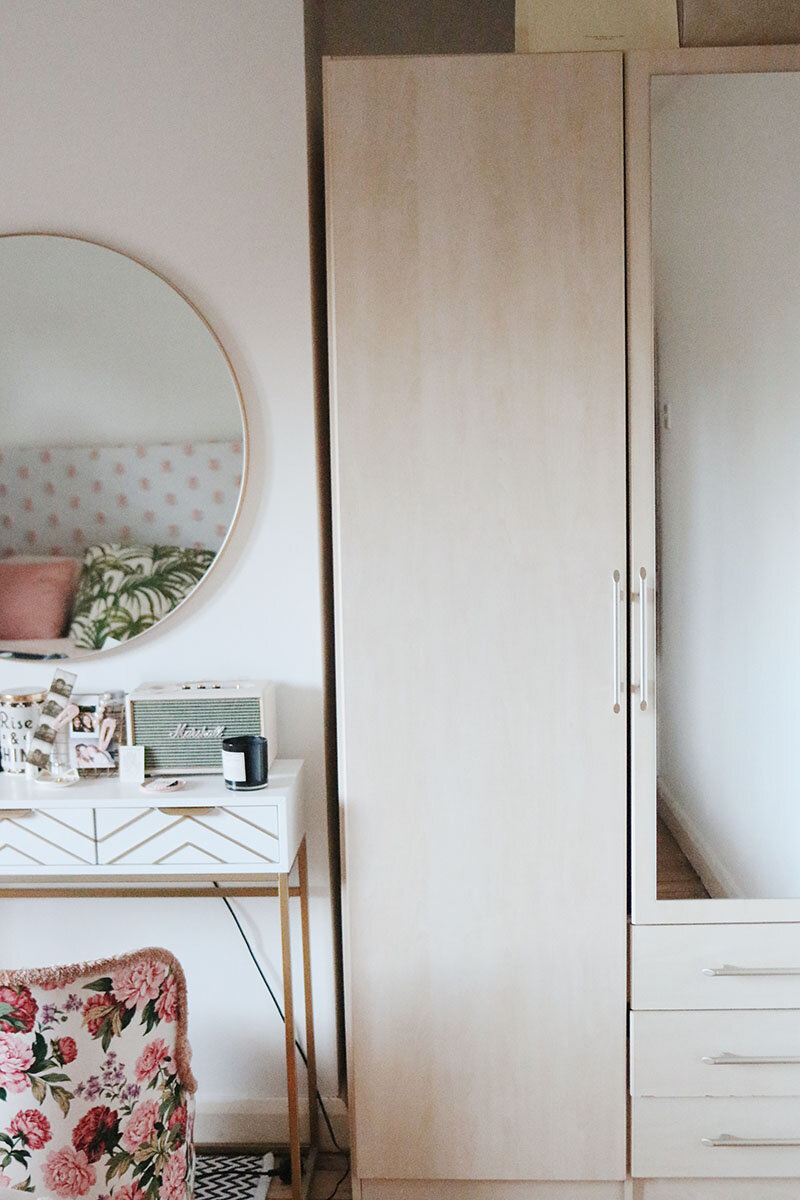
Valspar paint does come with its own built in primer, however as I hadn’t tested it before we embarked on the project, we decided to prime the doors anyway. The original doors are wood laminate, so didn’t need sanding.
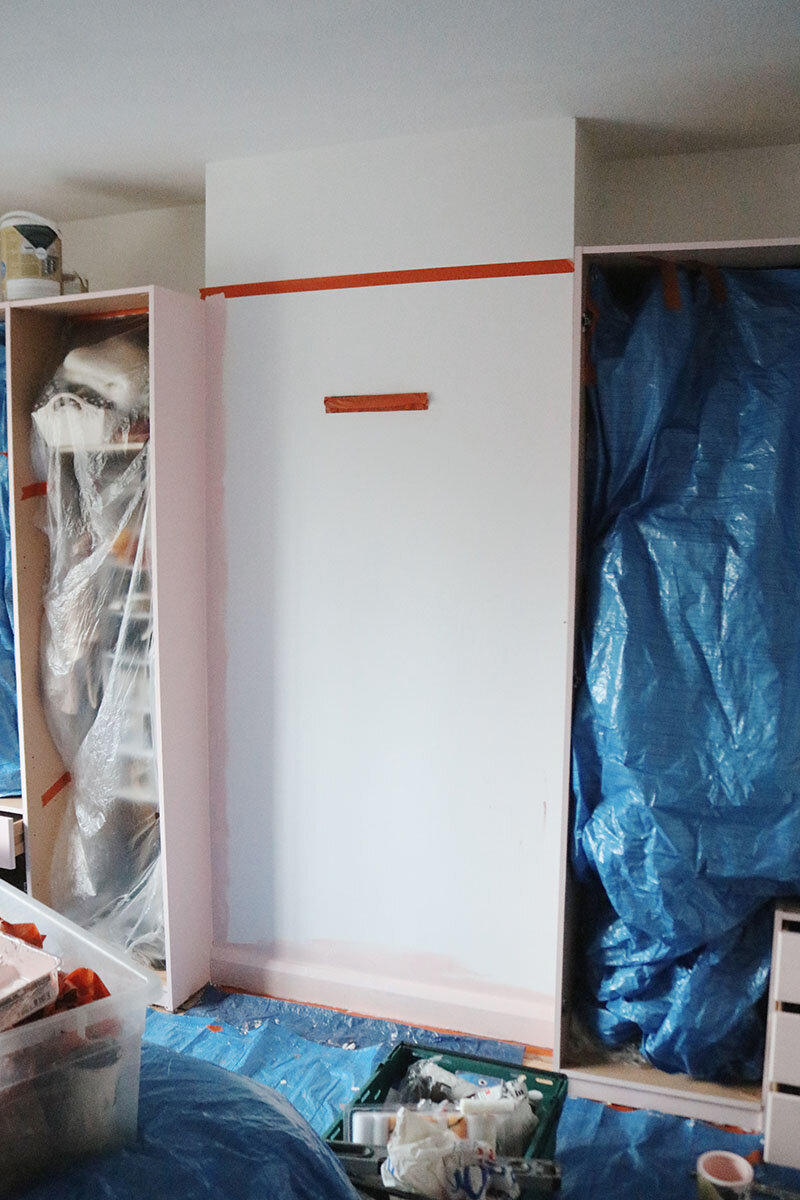


Next up was putting frog tape around (the best for decorating) the areas of the wall where the wardrobe met the walls, just to avoid any touching up later on.
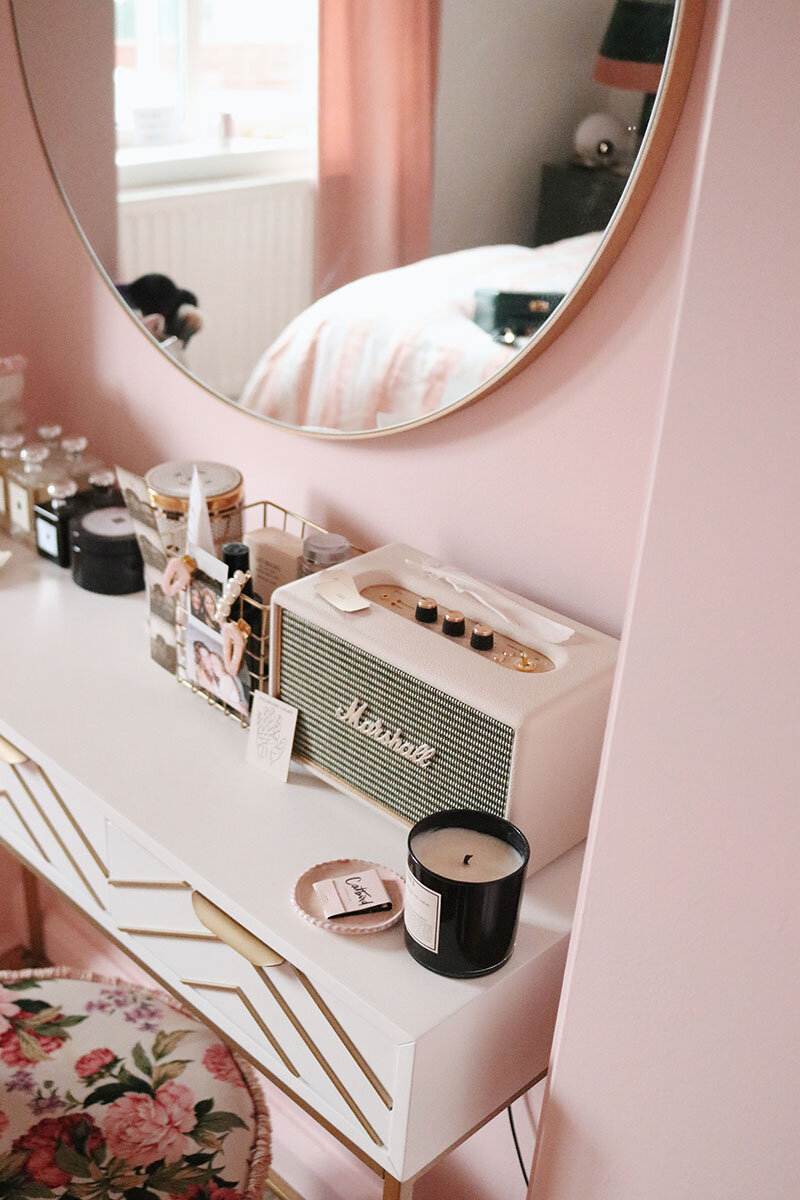
One coat of primer, and it was time to head into store to get our Valspar paint mixed to the perfect shade of pink, let me tell you that not all pinks were made equal. I took into store with me a pink ceramic dish to potentially colour match, this guided us in the right direction and eventually I decided upon the Pantone colour of 2016 Rose Quartz, and got it mixed in a Satin Finish and matt for the walls.
I like to use brushes for cutting in around mirrors and door edges, and rollers for larger surfaces such as doors. The doors were painted off their hinges, but for the last coat we ensured they were hung for a perfect final coat.


The door handles that we removed were replaced with gold handles, which I think elevate it and makes it looks really special. Lastly, we added a beaded trim to the foot of the wardrobe to hide a piece of carpet that they were sat on that constantly looked like it was dusty.
Overall, I am so happy with them and like most things, wish I’d done it sooner. In total it took three days, to allow the paint to dry / other things I had going on, but you could definitely get this done in less if you were solely concentrating on it.


Have you painted wood laminate before? How did it turn out?
Let me know in the comments below!
